
Lino Printing Tips: How do I make my colourful botanical lino prints?
The majority of my colourful botanical lino prints are created using the reduction lino print method. It is a lovely technique where you can create multiple colours and layers using just the one piece of lino.
For many this method can be a daunting task especially as if you make a mistake half way through you will need to start again. But if like me you kind of like that jeopardy and you want to find out a bit more about the technique then please carry on reading as I show you how I created one of my largest reduction lino prints to date, Haworhia Fasciata.

A Step by Step of a Reduction Lino Print - Haworthia Fasciata
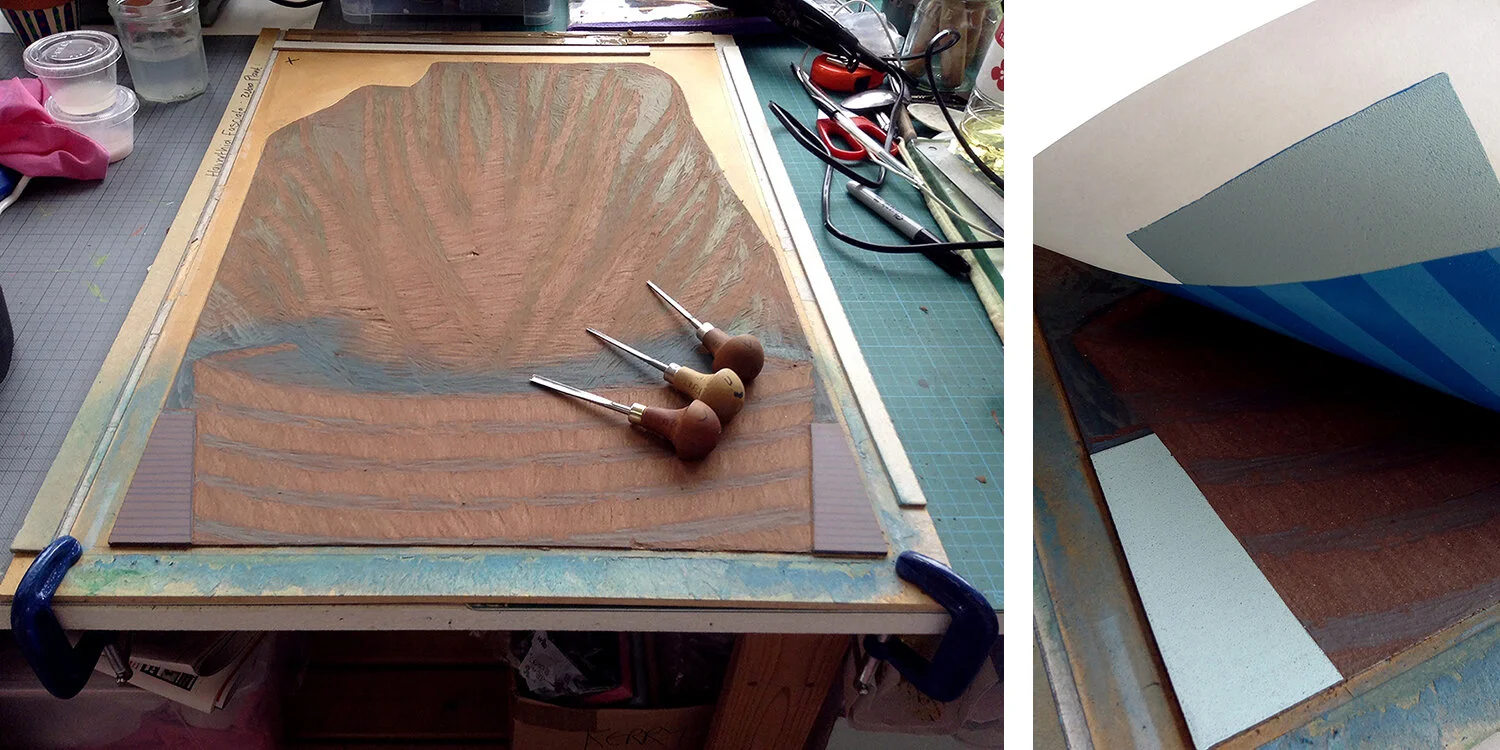
Haworhia Fasciata is to date one of my larger reduction lino prints (measuring at 65 by 48 cm) and so far one of my favourites. Made up of several layers using a mixture of cut layers and more painterly methods and took around 3 months to complete.
So where do you begin on starting a reduction lino print?
Design, Transfer and Carve
I began by working out my design. I usually draw directly on to the Lino but for this piece, because of its size, I decided to sketch it out onto paper first. Once I was happy I then went over it with a permanent marker. I like using Sharpies. So with the marker pen I went over my final drawing, making it visible on the other side and making it easier to see when transferring to the lino block.
For this design I used red Lino. To make it easier to see the image and my cut marks I painted the surface with a watered down white acrylic paint.

When lino printing the image will always print in reverse so if you want the image on your drawing to be what is printed you will need to flip it over and transfer in in reverse onto the lino. So by using compressed charcoal I rubbed over the front of my drawing, flipped it over, taped into place onto the lino and using a pen I then traced the image onto the lino.
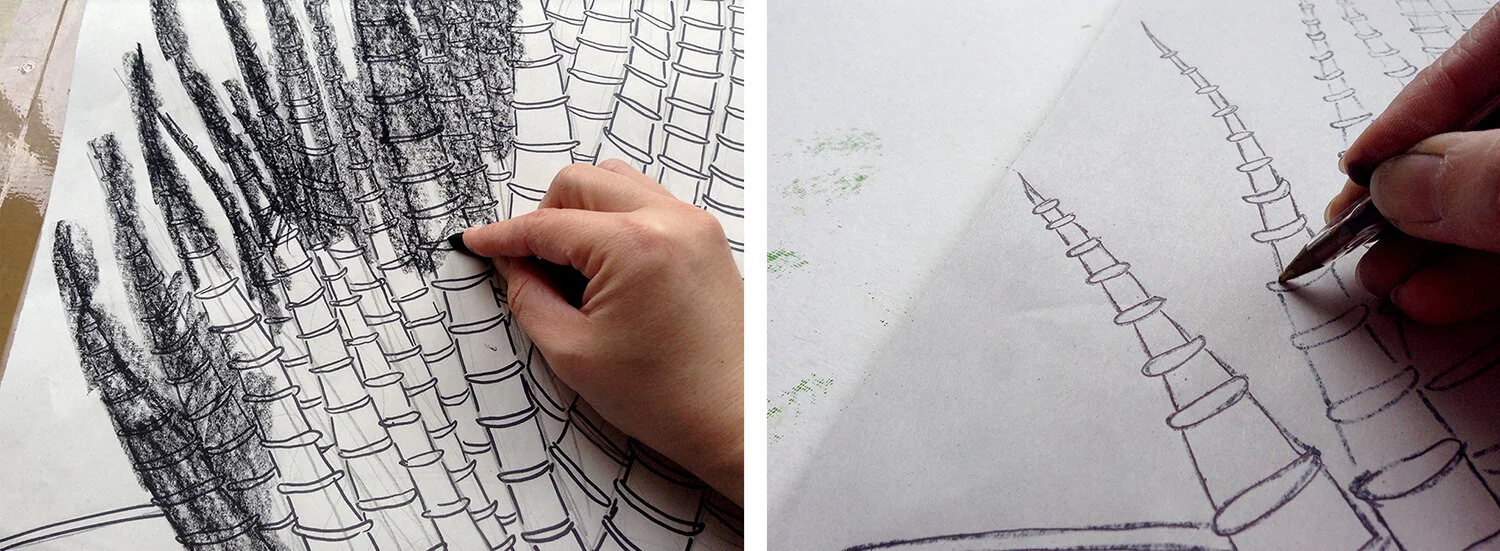
Using a the marker again I went over my transferred image. This makes sure the image remains on the lino in-between each layer and won’t wash off.
Using a watered down green acrylic I painted in the areas that I wanted to cut away first. Though this is very time consuming task, I find by doing this, especially with such a complicated design, makes sure I only cut out the green areas and don’t accidently cut the wrong bits.

The Printing Begins
Using Intaglio Printmakers Litho/Relief printing ink I mixed up my first colour, a pale creamy yellow and applied to the entire block. Using Simili Japon 130gsm paper I printed the first layer.
The areas I wanted to remain this colour (the bands on the stems) were then cut away ready for the next layer

For the next layer I wanted to create more varied tones of green rather that a flat green, so I mixed up 3 different greens sing small rollers, 2cm & 5cn wide, Concentrating on the plant and top of the plant pot area I did an overall light green and then added darker greens to certain stems, beginning the build up of tone and depth in the design.
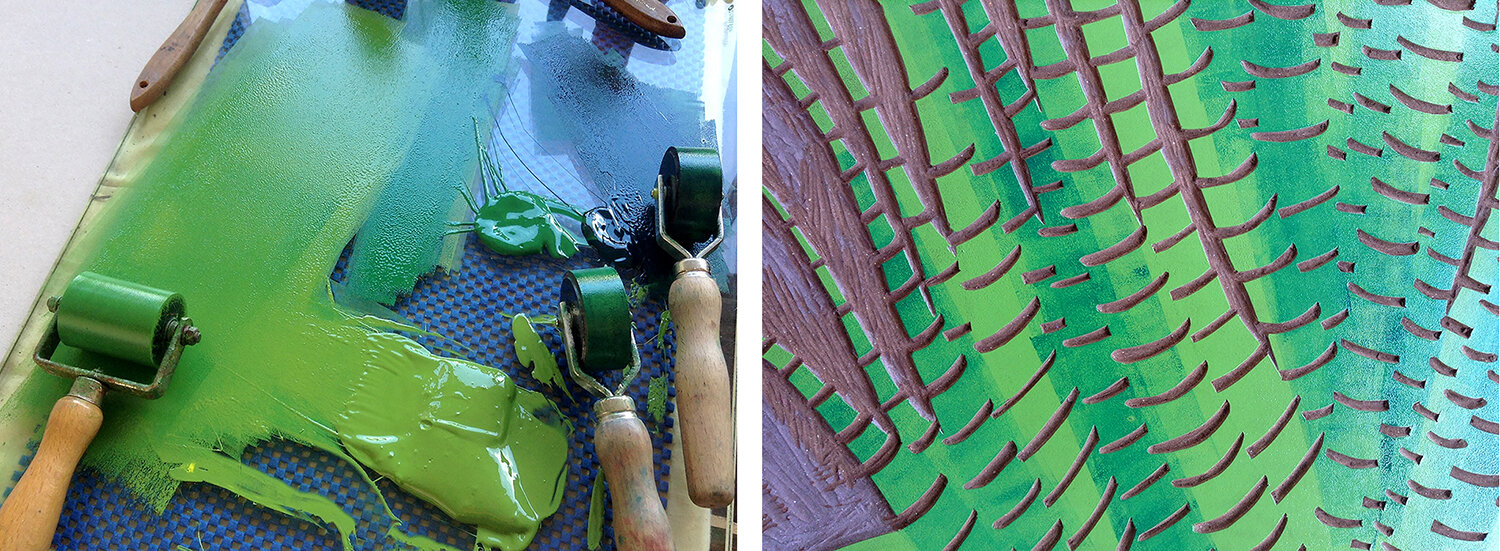

For the next layer I cut away some of the stems and inked and printed them up in a darker green.

At this point I thought the plant was looking too dark and I needed to bring in some lighter areas. So a couple of lighter greens were mixed and applied, giving more tone and depth to the plant.
At this point I was happy with the plant section of the lino print and decided it was complete. This section was cut away and was ready to focus on the plant pot area of the design.

I was having bit of a blue obsession at the time and used it quite a lot in within my work and it was no exception for this reduction lino print.
I began by printing the entire bottom part in a dark blue and where the green overlaps it appears to be darker.
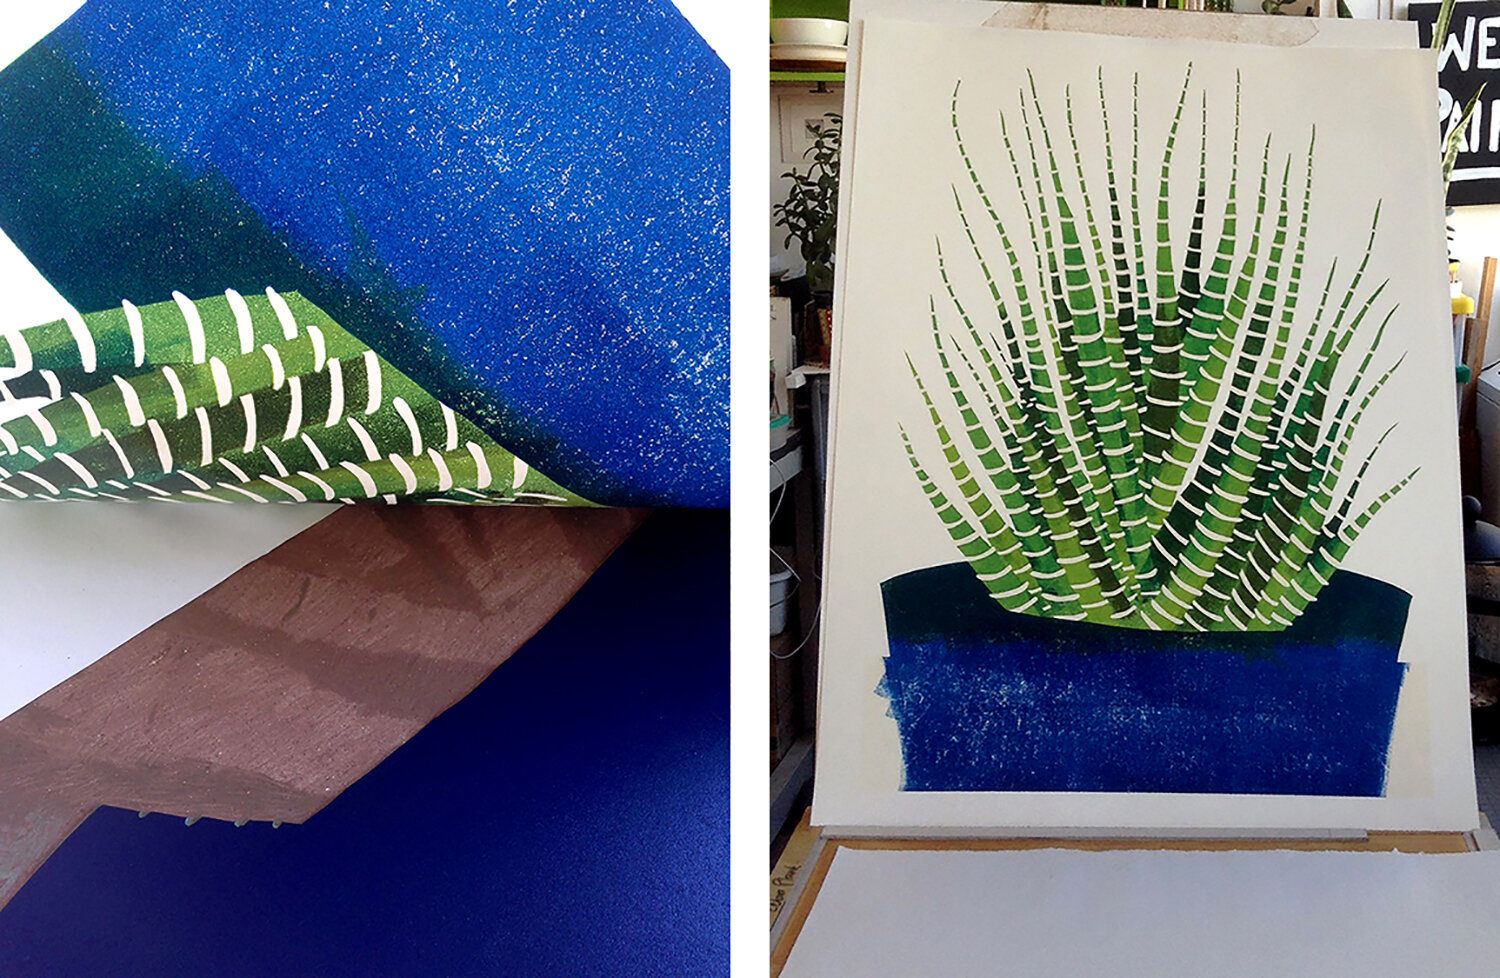
I cut away the area inside the plant pot and mixed up a lighter blue. This colour was then printed.
You may have noticed in a lot of my work that I’m keen on stripy pots and this Lino Print was to have even lighter blue stripes. The stripes were cut into the Lino ready for the next layer.

A paler blue was mixed and then printed.

The plant pot is now complete and all that was left was to cut it away just leaving the base of the lino.
A very pale blue was mixed and then printed giving the impression the plant is sitting on a table top/surface.
The Haworhia Fasciata Lino print is now complete.
Watch how a Reduction Lino Print is made
In this video I talk you through how to create a four colour Reduction Lino Print.
How do I buy Haworthia Fasciata Reduction Lino Print?
I have a couple of prints left and they are only available through Wychwood Arts gallery in Oxfordshire. See link below.
However I do have lots of other Reduction Lino Prints at lots of different price ranges available to buy directly form me through my Lino Print Shop and many are also available as greeting cards.
And Finally…
I hope you have enjoyed finding out all about how I made my Haworhia Fasciata Reduction Lino Print and maybe feel a little bit inspired to create your own. I would love to hear from you.
If you need some assistance please head over to my YouTube Channel Kerry Day Arts where I have lots of tutorials.
If you want a bit more hands on practice I run regular classes at the Bristol Folk House in the centre of Bristol.
Links
To buy my Haworhia Fasciata Reduction Lino Print visit Wychwood Arts
For printmaking supplies mentioned in post visit Intaglio Printmakers
For Lino Printing coursed visit Bristol Folk House
To watch more of my Lino Printing Tips videos visit Kerry Day Arts YouTube